Sensor Preview (No Hardware)
iROSLink turns your iPhone Pro into a ROS2 sensor bridge. This guide gets you from zero to live sensor data in Foxglove — no robot hardware needed yet.
What you need:
- iPhone 12/13/14/15 Pro or Pro Max (LiDAR sensor required)
- WiFi network (or use your iPhone's hotspot)
- A laptop or desktop on the same network
Use a private network
iROSLink opens a WebSocket server and Zenoh port on your local network with no authentication. Use a home, lab, or personal hotspot — not a public or shared network (university WiFi, coffee shop, office). Any device on the same subnet can connect to the phone and receive its sensor stream.
New to robotics?
This guide assumes no prior robotics knowledge. If you already have a ROS2 setup, skip to Zenoh Networking or Operating Modes.
1. Permissions
When you first open iROSLink, it requests:
| Permission | Required | Why |
|---|---|---|
| Camera | Yes | LiDAR depth sensor + visual tracking for SLAM (see step 3 below) |
| Local Network | Yes | Zenoh (the data transport protocol) communicates over WiFi |
| Location (GPS) | Optional | Only if you need /fix topic |
2. Connect to Foxglove
Foxglove is a free data visualisation tool for robotics — think of it as a dashboard where you can add panels to display whatever sensor data the phone is broadcasting. iROSLink has a built-in Foxglove WebSocket server — no bridge or Docker required.
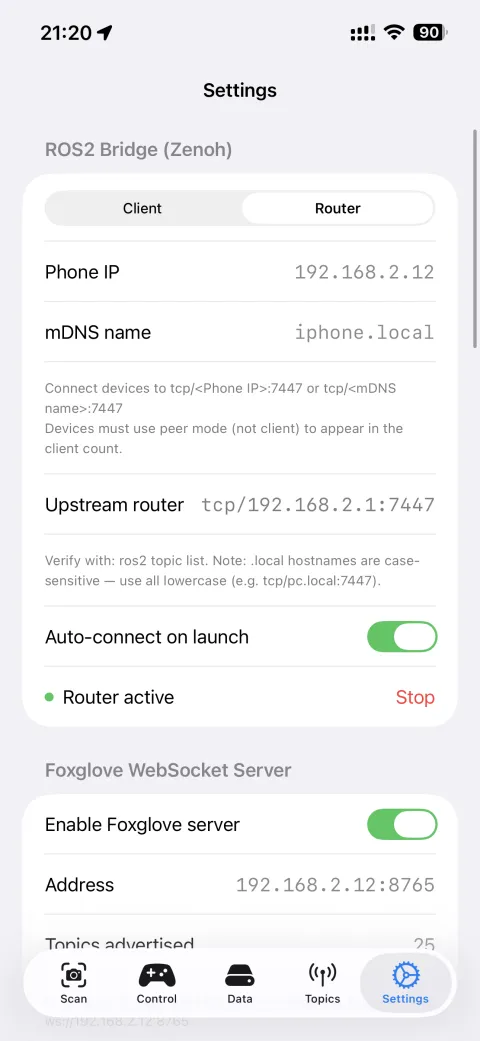
- Settings → Foxglove WebSocket Server → enable the toggle
- Note the address shown, e.g.
ws://192.168.1.42:8765or use your phone's mDNS name:ws://myphone.local:8765 - Open Foxglove Studio (browser or desktop app)
- Open connection → Foxglove WebSocket → enter the address → Open
- Go to the Scan tab and start a session — topics begin publishing
mDNS platform support
.local hostnames work out of the box on macOS and Linux. On Windows, install Bonjour (bundled with iTunes or Apple Devices).
If resolution fails, use the raw IP shown in the app. → Test with ping & troubleshoot mDNS
3. Explore in Foxglove
Add panels and explore what the phone is publishing.
Suggested panels to add:
| Panel | Topic(s) | What you see |
|---|---|---|
| 3D | /tf, /map, /odom |
Point cloud, robot pose, occupancy grid |
| Image | /camera/image_raw/compressed |
Live camera feed |
| Plot | /imu/data, /diag/cpu_percent |
IMU data, CPU load |
Map rotating?
In the 3D panel, open Settings → Display frame and set it to map. This keeps the map fixed while the robot (and its TF arrow) moves through it.
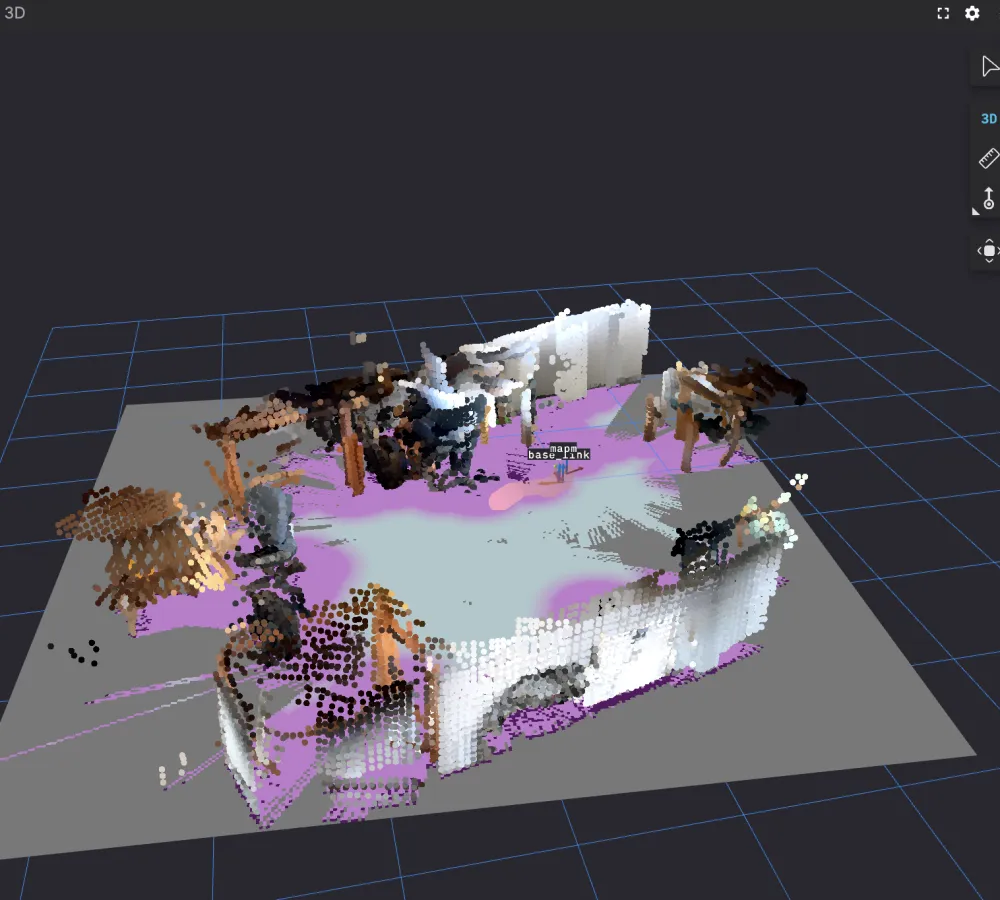
Move the phone around slowly and watch the point cloud build in real time. The 3D panel shows depth data from the LiDAR as the phone maps the space around it.
What is SLAM?
When you start a session in the Scan tab, iROSLink runs SLAM (Simultaneous Localization and Mapping). This means the phone figures out where it is and draws a map of the room at the same time — using the LiDAR and camera together. You'll see this map grow in the 3D panel as you move the phone.
You're done with this step when…
You can see a live point cloud or camera feed updating in Foxglove as you move the phone.
Next steps
The sensor data is live — now put it to work. Ready to build the physical robot?
→ Build & Configure — hardware, firmware, and app setup → Operating Modes — full mode details